
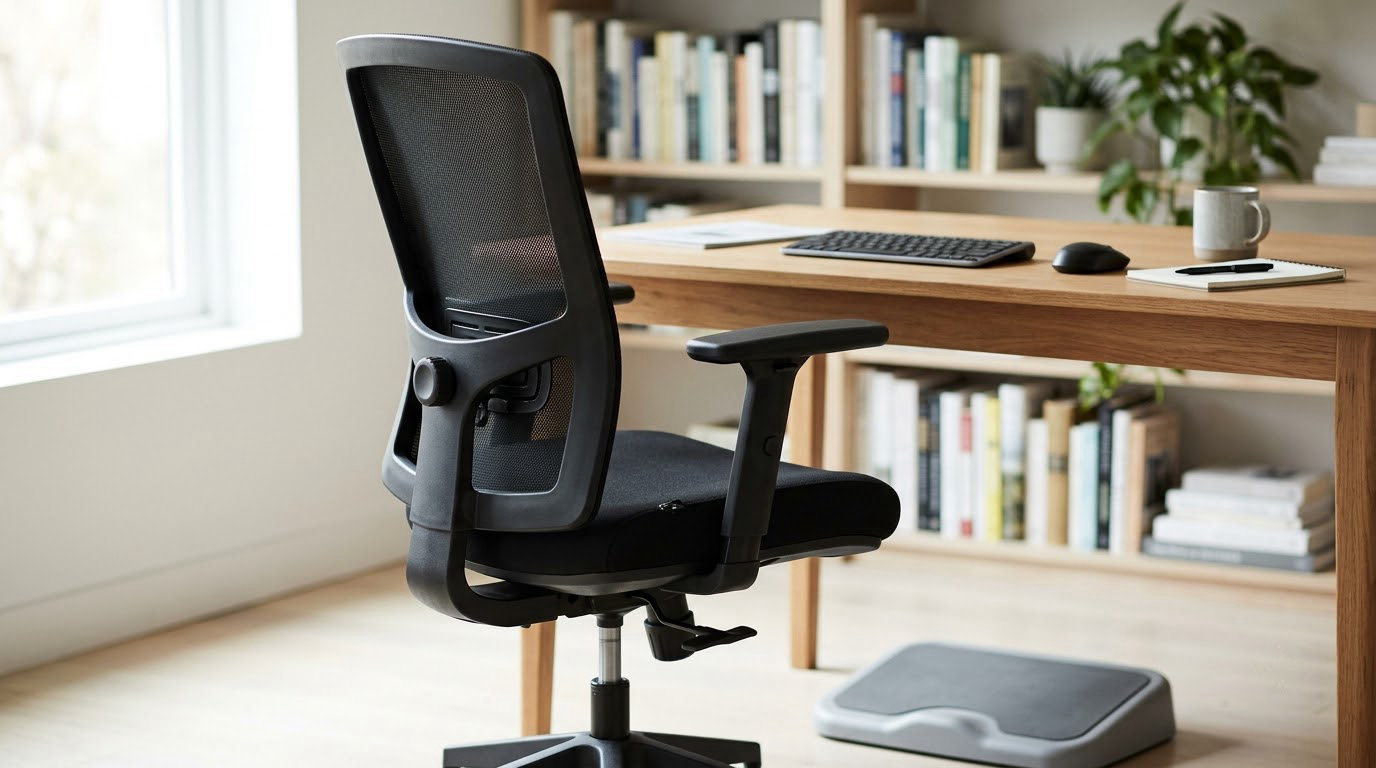
To adjust an office chair correctly, work through the controls in a fixed order: seat height, then seat depth, then lumbar support and backrest angle, then tilt tension, tilt lock, armrests and headrest. Finish with feet flat, knees at 90 degrees, lower back supported and elbows at 90 degrees with your shoulders down. The whole setup takes about ten minutes.
Most people get this wrong at the very first step. They pull the height lever while still sitting on the seat, the pneumatic cylinder barely moves, and they conclude the chair is broken. It usually isn’t. It is just being asked to do two things at once.
Order matters for a practical reason: every control you set later changes the effect of the ones you set earlier. Raise the armrests first and then set your seat height and your shoulders end up shrugged. Set the tilt tension before your lumbar support and you will spend the afternoon leaning forward to reach it. Work top down and back to front, and each adjustment stays where you put it.
This guide is for anyone who sits at a desk for more than a couple of hours a day, whether you have just started a job, inherited a shared chair from a hot desk, or have started to notice aching shoulders at the end of the afternoon. The same targets come from the OSHA computer workstations eTool guidance that most corporate safety programs are built on, so nothing here is a personal preference dressed up as advice.
Table of Contents
What You Need
Almost nothing. That is the point of a well-made task chair, and the reason you should be able to do this without a toolkit, a spanner or a YouTube tutorial with a shaky camera angle.
- Your chair, on a flat floor. Carpet pile and uneven boards make a chair behave differently, so check it on the surface it actually lives on.
- The controls. Look under the seat and along the underside of the backrest before you start. Most chairs have a lever or two, a round knob and sometimes a slider.
- The manufacturer’s guide or the model label. The label is usually stitched under the seat pan or stamped on the mechanism housing. It tells you the adjustment range and whether the cylinder is bolt-in or drop-in, which matters only if something breaks later.
- Optional: a tape measure, your phone for photographing your finished settings, a lumbar cushion or a rolled towel for a chair with no lumbar adjustment, and a footrest for a desk that sits high.
Tools are almost never required. Keep a hex key nearby only for the odd model with a bolted arm bracket.
Step-by-Step: How to Adjust an Office Chair Correctly
Where each control is
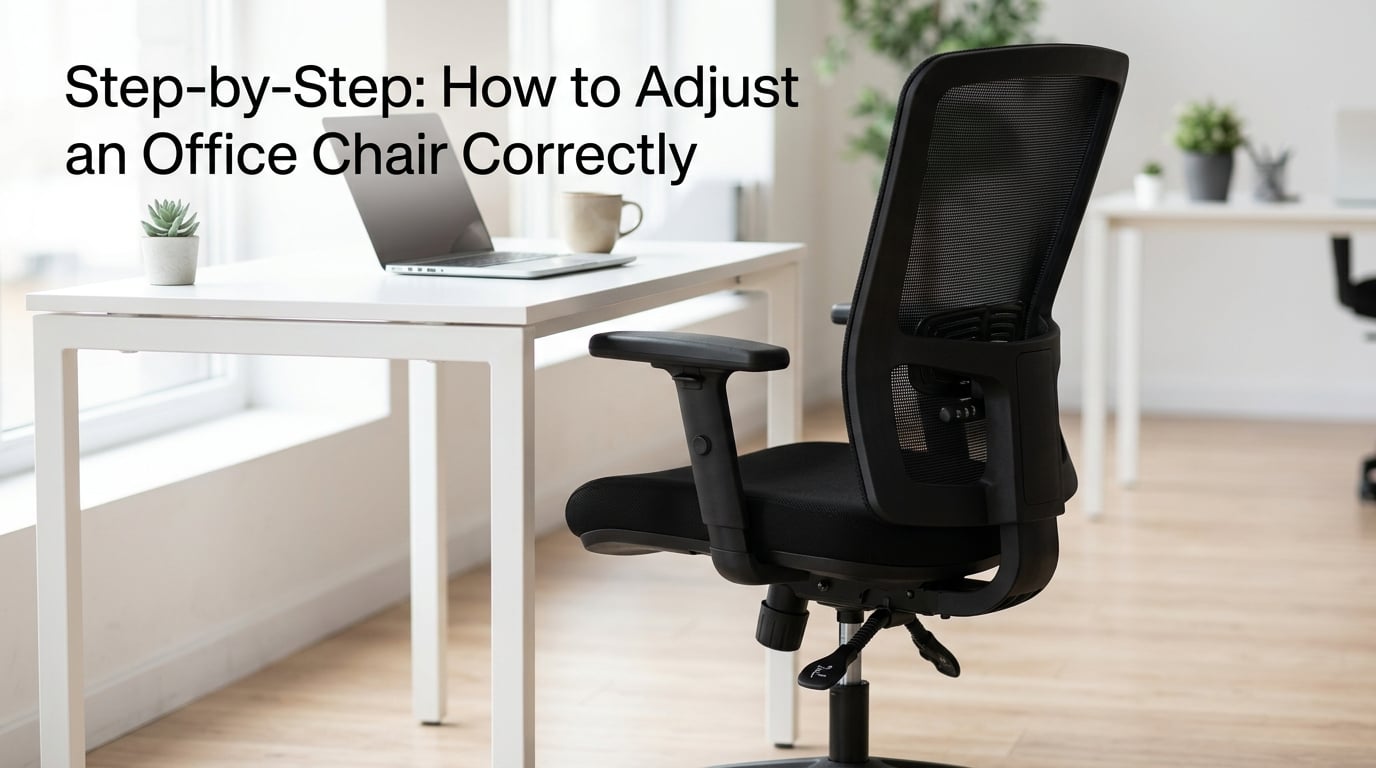
Almost every confusion about chair setup comes from not knowing which lever does what. Find these before you adjust anything, and check your own chair against the list because the layout varies between makers.
- Height lever — on the right-hand side under the seat, or a paddle on the seat’s right flank. Up raises the seat, down lowers it, driven by a pneumatic cylinder.
- Seat depth slider — usually a second lever or a small handle on the left-hand side under the seat. It slides the seat pan forward and back.
- Tilt tension knob — the round knob under the front or right of the mechanism housing, often marked with a minus sign and a plus sign. Clockwise tightens the resistance to reclining, counterclockwise loosens it.
- Tilt lock lever — a separate short lever next to the height lever or on the side of the backrest housing. It holds the backrest at a fixed angle. It does not adjust resistance; that is the knob’s job.
- Lumbar support — either a dial or pad on the backrest itself, or a horizontal bar on a mechanism at the base of the backrest that slides up and down.
- Armrest lever — a small paddle or knob beneath each armrest pad. It usually raises the pad, and often lets you swing the arms out of the way.
- Backrest angle lever — on chairs with a separate recline function, usually on the right side of the seat near the mechanism housing.
- Headrest lever — a small lever or knob on the back of the headrest itself, for height and sometimes for the gap between your head and the pad.
1. Set the seat height
Sit down, lift your weight off the seat by standing up partway, and hold the height lever in the position that lets the seat drop. This is the step almost everyone skips, and it is the reason so many chairs will not go down.
Now sit back down and check three things: your feet flat on the floor, your knees bent at about 90 degrees, and your thighs roughly parallel to the floor. If your feet are flat and your knees are closer to 100 or 110 degrees, come up slightly.
The 90-90-90 rule is just this written out: hips at 90 degrees, knees at 90 degrees, ankles at 90 degrees. It is a shorthand for a neutral pelvis and a neutral spine, not a posture you have to hold consciously all day.
How to tell it worked: you can slide your hand between your knee and the underside of the desk, and you are not shifting your weight from one thigh to the other to get comfortable.
2. Set the seat depth
Use the seat depth slider to move the seat pan forward or back until there is a gap of two to three fingers, roughly 1 to 2 inches, between the front edge of the seat and the back of your knees.
Too deep and the edge of the seat presses into the back of your thighs, which is the fast route to numbness in the front of your legs over a long afternoon. Too shallow and you are effectively perching, with all your weight on the ischial bumps at the back of the seat.
How to tell it worked: your back is in contact with the backrest and you are not sliding forward off the seat while you type.
3. Position the lumbar support
The lumbar support belongs at the small of your back, roughly belt height, where the inward curve of your spine starts. A dial or pad moves it in and out; a bar slides it up and down.
Set it snug, not pushing. You should feel steady support with no pressure to lean back into, and you should be able to slide two fingers between the support and your lower back. A chair with no lumbar adjustment at all can be improved with a lumbar cushion or a rolled towel placed in the same spot.
How to tell it worked: your lower back stays in contact with the backrest as you reach for your keyboard and mouse, without you leaning back deliberately.
4. Set the backrest recline
Most guidance puts the backrest between 100 and 120 degrees from the seat for general desk work. On a synchronous tilt mechanism the backrest angle is coupled to the seat, so you set it once and it holds its relationship as the chair rocks.
Sit back and let the chair settle into a position you could hold for a full meeting. If you are being pushed almost flat, the tension is too low or the lock is off. If you are sitting bolt upright with no give at all, loosen the tension a quarter turn.
How to tell it worked: your head and shoulders are not pulling forward of your chest, and you can still reach the keyboard without rounding your upper back.
5. Set the tilt tension, then the tilt lock
Turn the round under-seat knob counterclockwise to loosen recline resistance, sit back, and tighten it clockwise until the chair rocks back under your weight with a gentle push rather than dropping. The aim is low to medium tension: enough control that you are not thrown back, enough freedom that you can change position without standing up.
Two things to be clear about. The knob does not lock the chair, it changes how hard the chair resists leaning back. And turning it all the way is not a firmer setting, it is a swivel chair with the spring defeated.
The tilt lock is the separate lever next to the height lever. Engage it to hold the backrest where you set it, usually for typing or for a task where you want to stop drifting. Release it for reading, calls or any task where movement helps.
How to tell it worked: the chair moves when you shift back but returns to roughly where you started, and the lock lever visibly holds the position when pushed.
6. Set the armrests
Lower the armrests until your elbows rest at about 90 degrees, with your shoulders relaxed and dropping away from your ears. Your forearms should lie along the pads, with your wrists straight rather than bent upward.
The pads should support the elbows without pushing you up. If you have to shrug to clear the armrests, or the pad is pushing the desk out of reach, they are too high. Adjustable arms can also be moved inward and forward to reduce the gap to your body, which keeps your shoulders from splaying.
How to tell it worked: you can type for 20 minutes with your shoulders in the same place they started.
7. Set the headrest, if your chair has one
Height first: bring the pad to the back of your head, so it cradles the skull rather than pressing into your neck. The gap between the pad and your head should be about the width of your fist, and there is usually a second adjustment for that gap on the back of the headrest.
If the pad ends up in the middle of your neck when you sit back, the backrest is too upright. Loosen the tilt tension rather than raising the headrest to compensate.
8. Fine-tune for your body frame
Petite users under about 5 foot 5 often find the lowest seat height is still too tall, and that the standard 2 to 3 finger depth gap leaves them perched. Start at the lowest setting, use a footrest to fill the gap under your feet, and if the seat depth is adjustable, slide it further forward than the standard gap. Broad shoulders often need armrests brought closer to the body rather than lower. Taller users should check the headrest reaches properly at full recline.
Anyone wearing bifocal or progressive lenses should lower the monitor so the top of the screen is at or slightly below eye level, otherwise the chair has to tilt your head and the setup fights itself.
9. Check the whole setup and record it
Sit back and run through it in one pass: feet flat, knees at 90 degrees, gap behind the knees, lumbar contact, backrest at a supported angle, elbows at 90 degrees, head supported. If one thing is off, fix it and run the list again, because each fix can undo the one before it.
Then take a photo of each setting, or write down the armrest height and the number of clicks out from the bottom of the tilt knob. It takes two minutes and it means a shared chair or a hot desk can be restored in under a minute instead of adjusted from scratch.
Common Mistakes
These five come up more than any others, and all five are quick to undo.
Setting the chair for the floor instead of the person
The most common error is treating the lowest position as the goal. Height is not a ranking, it is a relationship between your feet, your knees and the underside of the desk. If your feet cannot reach the floor at a height where your knees clear the desk, you need a footrest, not a lower setting you cannot actually use.
Raising the armrests too high
Armrests set to support a standing desk get left up, and they push your shoulders toward your ears all day. The target is elbows at 90 degrees, shoulders relaxed. If the pads bump the desk and stop you getting close enough, they need to come down before anything else is adjusted.
Winding the tilt tension all the way tight
A knob turned fully clockwise feels solid, so it feels like a setting. It actually removes dynamic movement, which means you hold one static posture for longer. Start at medium and only tighten as far as you need for a reclined reading position.
Leaving your feet unsupported
Dangling feet push pressure into the back of the thighs and tilt the pelvis backward, and both feed straight into lower-back ache. A footrest, a stack of sturdy books or a box under the feet is a legitimate fix when the chair and the desk heights simply do not match you.
Making one adjustment and stopping
Setting the backrest and then never looking again is common, and it is how people end up in a position that was fine for the first two minutes. Posture changes through the day. A 60-second reset at lunch and at the end of the day, and a weekly look at the same checks, catches drift before it becomes discomfort.
When a control stops working
My chair will not go down
Stand up completely and hold the height lever down for several seconds before you sit again. A pneumatic cylinder needs a moment without weight on it to release. If it still will not drop, the cylinder has usually failed and the chair will not stay down for long without you either. That is a repair, not an adjustment.
The tilt knob will not turn
Do not force it with pliers. A knob that only turns part way is usually packed with dust and dried lubricant around its base; a drop of lubricant at the spindle, worked in by turning the knob gently, often frees it. If it is seized solid, the mechanism assembly is the part that needs replacing, and no amount of adjusting will help.
My chair leans back too far
That is usually tension set too loose rather than a fault. Turn the knob clockwise in small increments and rock back each time. If the backrest will not hold any position at all, the tilt lock lever is probably disengaged, and the mechanism on some budget chairs does not provide meaningful adjustment here.
My seat leans forward
Some task chairs have a forward-tilt function meant for concentrating on close detail work, and some have a seat pan that has slipped off its stop. Check whether you have engaged a seat tilt or forward tilt control. If the seat itself rocks forward under your weight, the mechanism needs servicing.
My feet dangle even at the lowest setting
On tall stools, a minimum seat height above the distance from seat to floor is a design limit, and no adjustment gets around it. Most people treat this as one of two fixes: a footrest, which costs nothing and solves it today, or a shorter replacement cylinder, which is worth doing if the chair is otherwise the right one and the cylinder is a drop-in fit. Forcing a stuck cylinder out with pipe wrenches and hammers is the step to avoid; purpose-made removal tools exist precisely because the improvised version damages the housing.
Frequently Asked Questions
What is the correct order to adjust an office chair?
Set the seat height first, then seat depth, then lumbar support and backrest angle, then tilt tension and tilt lock, then armrests, then the headrest. Height first because everything else is measured against where your knees and feet land, and armrests last so the desk and your shoulders are the final reference. A full pass takes about ten minutes.
What is the knob on the bottom of an office chair for?
The round knob under the seat is the tilt tension control. It changes how hard the chair resists reclining, not where the backrest sits. Turning it clockwise increases resistance, counterclockwise decreases it. It does not lock the chair. Locking the backrest is a separate lever, usually next to the height lever on the right-hand side of the mechanism.
What is the 90-90-90 rule for sitting?
It describes hips, knees and ankles all bent at 90 degrees. In practice it means feet flat on the floor, knees at about 90 degrees and thighs roughly parallel to the floor. It is a shortcut for a neutral pelvis and neutral spine, not a posture to hold consciously. It is a starting point that you adjust for your desk height and your own proportions.
How high should my office chair be at the desk?
High enough that your elbows are at 90 degrees and your shoulders stay relaxed, with your feet flat on the floor. If raising the seat to reach the keyboard leaves your feet off the ground, you need a footrest rather than a lower setting. If the chair cannot fit under the desk at your correct height, the desk is the problem, not the chair.
Why is my office chair not lowering?
Stand up completely and hold the height lever down for several seconds before sitting again. A pneumatic cylinder often needs a moment with no weight on it to release. If it still will not drop, the cylinder has usually failed and the chair will not hold height once you sit. Replacing a cylinder is straightforward on most chairs, but the mechanism is the part to replace if the lever feels slack.
Is leaning back in an office chair bad?
No. A backrest angle between 100 and 120 degrees with low to medium tilt tension is the position most desk guidance recommends, and it spreads load across your back rather than holding you in one static shape. What does help is changing position regularly, so use the tilt lock for focused typing and release it for reading or calls so the chair can move with you.
Conclusion
Start with the height lever and get your weight off the seat while you pull it. Feet flat, knees at 90 degrees, two to three fingers behind your knees, lumbar support at belt height, backrest at 100 to 120 degrees with medium tension, elbows at 90 degrees. That sequence takes ten minutes, it needs no tools, and it fixes more discomfort than most people expect from a chair they thought was simply the wrong one.