

A tool safety inspection checklist is a short, repeatable set of condition checks you run before a tool is used, to confirm it is free of defects that could injure you or someone nearby. It takes about 30 seconds for a hand tool and two minutes for a power tool, and it is the practical answer to the employer duty in 29 CFR 1910.242(a) to keep hand and portable power tools in safe condition.
Most sites fail at the boring parts: nobody writes down the result, so nobody can prove the check happened. The steps below run in order and end with a written record, because a checklist with no entry behind it is just a habit.
If you do not have written procedures yet, start with our guide to how to write a workplace health and safety policy, then bolt the inspection form onto it.
Table of Contents
- What You Need
- Step-by-Step Tool Safety Inspection Checklist
- 1. Identify the Tool and Its Required Condition
- 2. Check the Handle, Grip, and Body for Damage
- 3. Inspect Cutting Edges and Working Parts
- 4. Verify Guards, Shields, and Safety Features
- 5. Check Electrical and Battery Components When Applicable
- 6. Test the Tool Without Creating a New Hazard
- 7. Mark, Remove, and Report Unsafe Tools
- 8. Record the Result and Make the Tool Available Again
- Common Mistakes
- Frequently Asked Questions
- What should be included in a tool safety inspection checklist?
- How often should tools be inspected?
- Who is allowed to remove a tool from service?
- What defects mean a tool must be removed from service?
- Do I need a written tool inspection record?
- What is the difference between a pre-use check and a formal inspection?
What You Need
Gather these before you start, not after you find a cracked handle.
- The checklist itself, one copy per shift or per inspector, with a line for every tool in the kit rather than a single box for the whole kit.
- Manufacturer instructions for each tool type. Guard, trigger and wheel specifications come from there, not from memory or from a coworker’s habits.
- The employer’s written inspection procedure, which sets cadence, who signs, and what happens to a failed tool.
- Isolation equipment where relevant: lockout tagout locks and tags for energy isolation, a battery isolator, and a bleed valve key for pneumatic lines.
- A clean, well lit work surface so grease, cracks and missing fasteners are visible rather than guessed at.
- A defect log or tool register with a tag or lockout device to attach to anything removed from service.
Step-by-Step Tool Safety Inspection Checklist
Run the eight steps below in the same order every time. Record what you find before you move the tool, during the check, and at the end, so the form captures the tool identifier, the condition found, and the return-to-service decision.
1. Identify the Tool and Its Required Condition
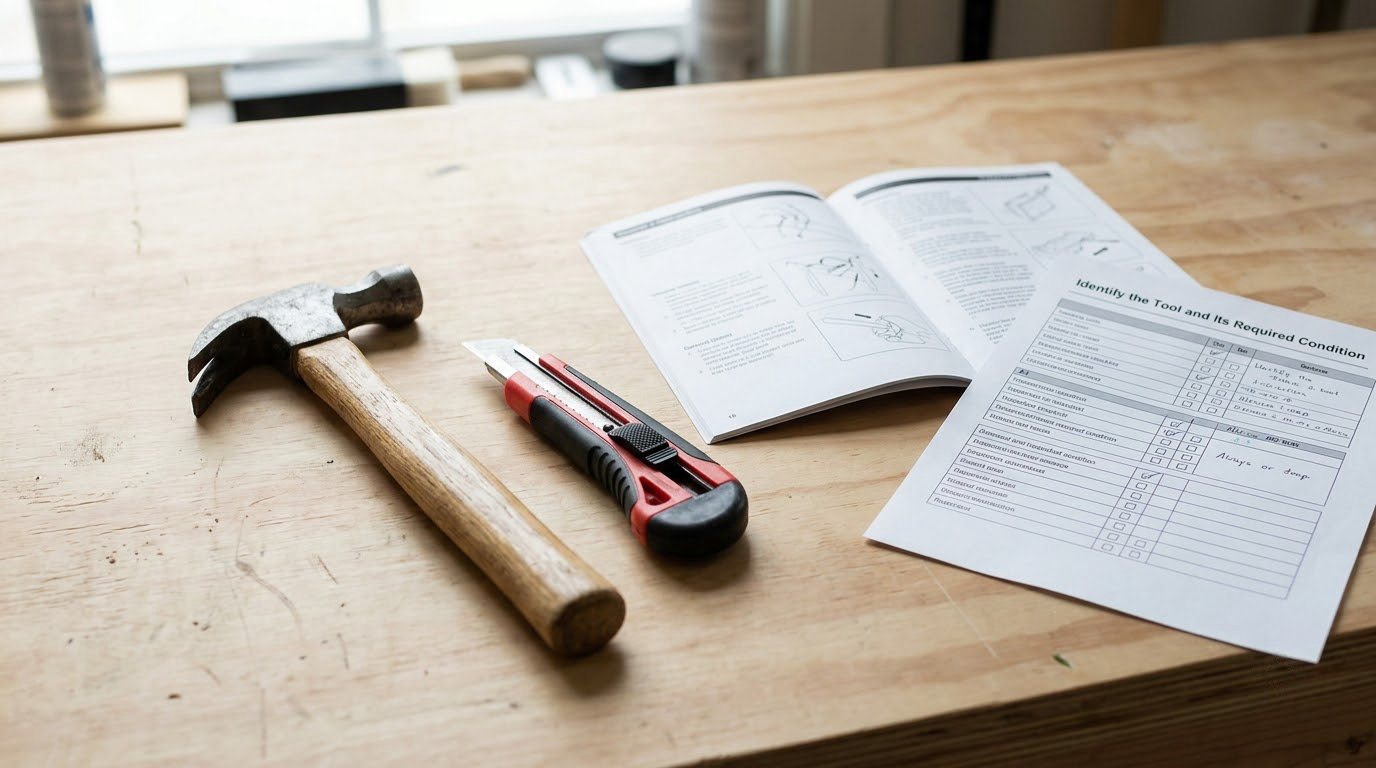
Start by confirming what the tool is, what it is meant to do, and what condition it must be in for that job. A torque wrench used as a hammer and a torque wrench used correctly are two different tools with two different standards, and your checklist needs to reflect the intended use.
Compare the tool against the manufacturer’s instructions and the employer’s written procedure. Check the model designation, the required protective features and the specified inspection frequency before you look for damage.
2. Check the Handle, Grip, and Body for Damage
Look for cracks, splits, looseness, splinters, corrosion, impact marks and loose fasteners on handles, grips, housings and attachment points. A handle that is cracked, cracked-through at the striking end, or taped, glued or welded back together is a reject condition no matter how serviceable the rest of the tool looks.
Reject any makeshift handle outright: a length of pipe over a chisel tang, tape wrapped around a split screwdriver handle, or a wooden dowel fitted into a hammer eye. On chisels and punches, look for mushroomed or split heads, where repeated hammering has deformed the striking face.
3. Inspect Cutting Edges and Working Parts
Check blades, bits, jaws, teeth, dies and other working components for nicks, bends, excessive wear, dullness, chipping and embedded material such as pitch, concrete dust or sap.
For circular and table saws, run the blade over your fingers for a hairline crack that will not be visible face-on. For abrasives, check the wheel label against the tool’s rated RPM, and reject a wheel that is cracked, chipped at the edge, or loaded with material from previous grinding. For chucks and collets, look for a worn or corroded bore that would let the bit slip under load.
4. Verify Guards, Shields, and Safety Features
Every guard, shield, interlock, spring and safety feature must be present, secure, functional and unmodified. Guarding is a specific requirement in 29 CFR 1910.242(b) for portable power tools, and it applies to the tool in the state the manufacturer supplied it.
Check that switches return to the off position when released, that trigger locks function, and that no guard has been removed, wedged, taped or bypassed. A saw whose lower guard has been removed to clear a jam is out of service until repaired, regardless of how experienced the operator is.
5. Check Electrical and Battery Components When Applicable
For corded tools, inspect the cord from plug to tool for cuts, nicks, frayed insulation, exposed conductors, crushed sections and damaged strain relief. Look at the plug for missing or bent prongs, and reject any three-prong plug with a missing ground pin or a two-prong adapter fitted to a grounded tool.
Confirm the tool is destined for a GFCI-protected receptacle where one is required, and that the tool itself carries an intact double-insulation symbol or a tested continuity-to-ground. For battery tools, look for swollen or cracked packs, wet terminals, damaged contacts and a charger with a broken lead; isolate the battery before opening any housing.
If a component exposes hazardous energy, use the applicable isolation or lockout tagout procedure before you examine it. Never defeat a lockout to finish an inspection faster.
6. Test the Tool Without Creating a New Hazard
Perform only the functional checks the manufacturer’s instructions and your workplace procedure permit, wearing the appropriate PPE and working in a clear test area with no one in the line of fire. Keep the test brief and at the lowest setting the tool allows.
For pneumatic tools, confirm the air supply is disconnected before any adjustment, and check the trigger type: contact-trip triggers must not be tied or blocked, and sequential triggers must actuate properly. Never exceed the manufacturer’s rated air pressure, and check hoses for cracking at the fitting and for whip damage across the work area.
Never bypass a safety device and never operate a visibly damaged tool to see how it behaves. A test is not worth a fragmenting wheel.
7. Mark, Remove, and Report Unsafe Tools
Tag the tool as out of service immediately, isolate it from use, and report the defect through the employer’s process. A Do Not Use tag goes on the tool itself, the tool moves to a designated quarantine location, and the tag records the date, the defect and who removed it.
Separate a clearly unsafe tool from one that merely needs routine maintenance. A blunt chisel, a dull planer blade or a worn sharpening stone is a maintenance item to route through your normal servicing process. A cracked housing, a missing guard, a mushroomed chisel head or a cord showing copper is an unsafe tool, and no amount of use is permitted until a competent person repairs and verifies it.
Check your hand protection at the same time as the tool. Our guide to choosing the right safety gloves for a job covers fit and cut resistance, and gloves with a hole in the palm are removed on the same principle as a cracked handle.
8. Record the Result and Make the Tool Available Again
Write down the tool identifier or asset number, the inspection date, the inspector’s name, the condition found, the defects noted, the corrective action taken and the return-to-service decision. A form with an empty defect column tells an inspector nothing two years later, so fill it in the same day.
Require competent-person approval before a repaired tool goes back into service, and record who gave that approval. If your program separates the operator’s pre-use check from the formal inspection, say so on the form: the operator signs the pre-use line, the competent person signs the formal line, and both sign the register entry for any return-to-service decision.
Run these checks on a cadence that matches the tool and the work. Pre-use for anything used on a single shift, daily for shared kits, weekly for active shop equipment, monthly for a documented self-audit, and a competent-person formal inspection on the interval your procedure and manufacturer guidance specify.
Common Mistakes
Almost every failed tool program fails the same way, and the defects show up long before an injury does.
Skipping the written record. A verbal or remembered check is not defensible. If a citation arrives, an unrecorded inspection looks like no inspection at all.
Relying on appearance alone. A tool can look fine and still hide a cracked blade root, a cord damaged inside the insulation, or a guard pinned open by a strip of tape. Check condition against a fixed criterion, not against your mood that morning.
Testing a damaged tool. Energising a tool you have already found defective converts a maintenance problem into a laceration or a shock. Tag first, test only when the check is permitted.
Removing tags informally. A tag that a worker peels off “because it is probably fine” removes your only control. Only a competent person lifts a tag, and only after the repair is verified and logged.
Skipping isolation. Reaching into a powered tool or a pressurised pneumatic line without disconnecting the energy source is the single fastest route to an amputation citation.
Working unguarded. 29 CFR 1910.242(b) does not have a practical exception. If the job cannot be done with the guard fitted, the job needs a different method, not a modified tool.
Signing what you did not check. The commonest failure is the tick-box habit: the same initials appear on forty forms a week regardless of condition. The countermeasure is unremarkable but effective. Supervisors spot-check by pulling a random tool and asking the signer to describe its last recorded defect, and records that cannot survive that question get discarded rather than filed.
Fixing this needs more than a form. Our piece on building a safety culture at work covers why workers stop reporting defects once reporting feels pointless.
Frequently Asked Questions
What should be included in a tool safety inspection checklist?
Include one line per observable condition: tool identity and intended use, handle and grip condition, cutting edge or working part wear, guards and safety features present and functional, cord, plug and battery condition, trigger or switch return, and the inspector, date and return-to-service decision. Each line should be answerable pass, fail or not applicable so the form produces a record rather than an opinion.
How often should tools be inspected?
OSHA does not set one universal interval for hand and power tools, so your employer sets the cadence in the written procedure and follows manufacturer guidance. In practice most sites run a pre-use check by the operator, a documented daily check for shared kits, and a competent-person formal inspection at a set interval such as monthly or quarterly.
Who is allowed to remove a tool from service?
Any worker who finds a defect should stop using the tool, tag it and tell the supervisor, and nobody needs permission to stop. Lifting the tag and returning the tool to service is reserved for a competent person who has verified the repair. Allowing a tagged tool back into circulation without that verification is the control failure that turns a defect into an incident.
What defects mean a tool must be removed from service?
Remove the tool for a cracked or makeshift handle, a mushroomed or split chisel head, a cracked saw blade, a missing or bypassed guard, a cord showing exposed conductors or damaged strain relief, a plug missing its ground pin, a swollen battery pack, a switch that sticks on, an abrasive wheel that is cracked or exceeds the tool’s RPM rating, or a pneumatic hose cracked at the fitting.
Do I need a written tool inspection record?
OSHA requires that tools be maintained in safe condition, and the written record is how you demonstrate that maintenance happened. Construction and general industry rules also require self-inspection records. Keep the register for at least as long as your company retains other safety documentation, and expect to produce it if an incident is investigated.
What is the difference between a pre-use check and a formal inspection?
The pre-use check is the operator’s brief look before use, taking under a minute and covering the defects that make the tool unsafe that shift. The formal inspection is a scheduled, documented review by a competent person covering more detail, scheduled maintenance intervals and the return-to-service decision after a repair. Sites that run only one of the two usually end up with tag discipline problems.
Start with one tool kit today. Print the checklist, run all eight steps on every item in it, tag anything that fails, and file the first register page the same afternoon. Repeat it tomorrow, and the habit writes itself before 2026 is out.