

The hierarchy of controls is the OSHA and NIOSH framework that ranks ways of protecting workers from most effective to least effective: elimination, substitution, engineering controls, administrative controls, and personal protective equipment. To use it, start at the top and work down, moving to a lower level only when the one above is genuinely not feasible.
That last clause is where most real applications go wrong. People move down the pyramid because a control is expensive, inconvenient, or unpopular with a supervisor, and then the record shows a decision nobody actually tested. Knowing how to use the hierarchy of controls means being able to state, in one sentence, why the stronger control did not happen.
The framework takes about an hour per hazard if you already know the hazard. The hard part is rarely the ordering; it is naming the hazard precisely enough that a control can be designed against it, and then verifying after the fact that the control did what you expected.
Table of Contents
- What You Need to Use the Hierarchy of Controls
- Step-by-Step
- Common Mistakes
- Applying the Hierarchy When the Top Levels Are Unavailable
- How to Document the Decision
- Frequently Asked Questions
- What is the first step in the hierarchy of controls?
- Can we use more than one control at the same time?
- Is training an engineering control?
- How do we choose between two feasible controls?
- Does the hierarchy of controls apply to ergonomic and psychosocial hazards?
- How should employers document their hierarchy-of-controls decisions?
What You Need to Use the Hierarchy of Controls

Before you touch the pyramid, gather what a control decision depends on. Without these inputs you are guessing, and a guess makes a weak record.
First, a written description of the hazard. Not “chemical exposure in the paint shop” but “chromate-containing aerosol from spray booths 2 and 3 during the Tuesday production run.” Specific hazards produce specific controls; vague ones produce a generic respirator program.
Second, worker input from the people who do the task every day. They know which step actually generates the exposure, which workaround already exists in practice, and which control gets quietly bypassed.
Third, the applicable requirements for your jurisdiction and industry. In the United States, OSHA standards set the floor, and several make specific control levels mandatory rather than optional. Under 29 CFR 1910.134, the focus is reducing employee exposure to air contaminants by means of engineering controls.
Fourth, the source material for the hazard: safety data sheets, equipment manuals, past incident reports, near-miss logs, and any monitoring results showing how much exposure is actually occurring.
Fifth, an honest list of control options at each level, including the equipment and money realistically available to you. A feasible control is one you can install, maintain, and staff, not one that looks good on paper.
Finally, a way to check results afterward, whether that is exposure monitoring, a task observation, or a simple record of near misses before and after.
Step-by-Step
1. Identify the Hazard and Who Is at Risk
State the source, the route of exposure, the tasks involved, the people exposed, and the potential severity. A hazard statement is finished when someone who was not in the room could picture the task from your words.
Include everyone affected, not only the operator. A grinding noise hazard reaches the worker doing the grinding and also the welder 20 feet away who has to shout to be heard. A fume hazard reaches the fabricator and the shipping clerk who walks through the cloud.
Be honest about severity at this stage, because the hierarchy is not a risk ranking. You apply it to the hazard regardless of how likely or how bad the outcome is. Deciding whether the hazard deserves attention at all belongs to your risk assessment, not to the pyramid.
For ergonomics and psychosocial hazards, the source is the design of the work rather than a chemical or machine. Repetitive wrist flexion in a packing station, or a workload that guarantees missed breaks, can be described just as precisely.
2. Consult Applicable Requirements and Worker Knowledge
Check what the rules require before you choose anything. Some standards name the control level outright. OSHA’s respiratory protection standard treats engineering controls as the primary route for airborne contaminants, and respirators as the complement when engineering controls cannot fully control exposure.
Read the source documents for the hazard itself. Safety data sheets describe the substance, not the task, and they never tell you whether your spray booth has a compliant filter or whether your press has an interlock.
Then ask the people doing the work. On a fabrication floor, a worker will usually tell you that the loudest operation is not the obvious one, or that the local exhaust duct was disconnected months ago and never reconnected.
Treat no single source as the whole answer. Regulations set minimum requirements, manuals describe intent, incident history shows what actually failed, and worker knowledge shows what actually happens. The decision comes from all four together.
3. Consider Controls From Strongest to Weakest
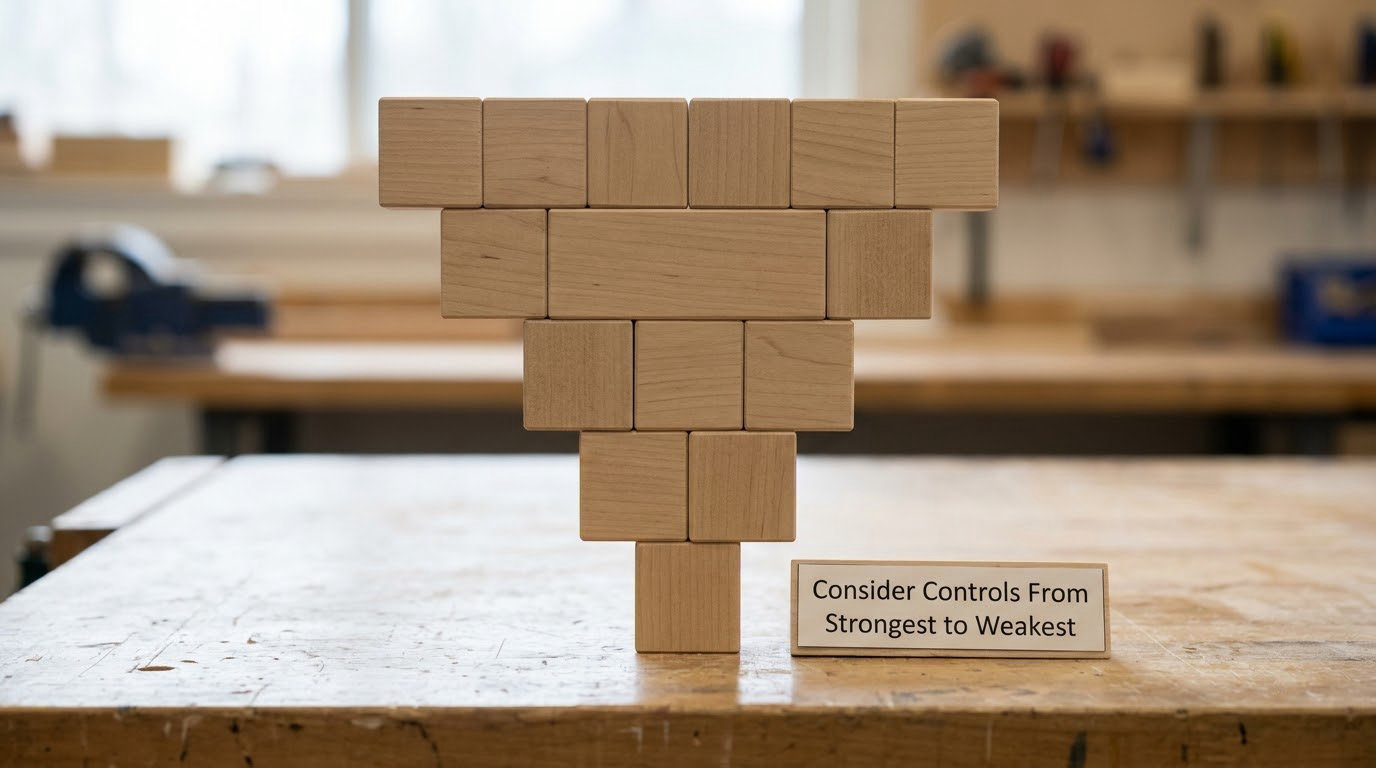
Work down in order and generate options at each level before you reject anything. Skipping straight to a familiar solution is how the pyramid ends up decorative.
Elimination removes the hazard physically. Cancel the task, move the process off-site, or automate the step so nobody is exposed. Bending a bracket in a vice by hand instead of striking it with a hammer is elimination, because the impact energy never exists.
Substitution swaps in something less hazardous. Solvent-based paint for water-based paint, or silica sand blasting media for a non-silica medium, reduces the hazard without removing the task. Here is the test that auditors push on: if the task still happens and something in it changed, it is substitution.
Engineering controls isolate people from the hazard through physical design. Machine guarding, interlocks, guardrails, local exhaust ventilation, and wet methods all belong here, because they protect a worker who is paying no attention at all.
Administrative controls change how the work is organized. Rotation, permit-required confined space entry, lockout/tagout, training, checklists, and scheduled preventive maintenance sit at this level. They depend on people doing what the procedure says, every time.
Personal protective equipment puts a barrier between the worker and the hazard. Respirators, gloves, eye protection, and hearing protection are the last line of defense, not because they are useless but because they only work when worn, fitted, maintained, and replaced.
Moving down a level is legitimate. Moving down because a supervisor says so is not. Write down the reason at each step: “elimination not feasible, the process is required by contract and cannot be relocated” is a reason; “too expensive” is usually a sign you have not costed the injury it prevents.
4. Select and Implement the Strongest Feasible Control
When two controls both work, choose on effectiveness first, then feasibility, then cost. Feasibility covers whether you can install it, maintain it, and staff it without the control quietly disappearing in six months.
Then write the implementation plan before ordering anything. Name who owns the install, who trains the crew, what acceptance test confirms it works, and what date you will review it. A control with no owner and no date is a wish.
Layer where you can. The same silica hazard usually ends up with a combination: wet cutting or a water-based abrasive at the substitution level, local exhaust ventilation or a guarded enclosure at the engineering level, exposure monitoring and a competent person program at the administrative level, and a respirator for the residual.
One caution about layering: controls have side effects. Guarding a machine so well that maintenance cannot reach it creates a new hazard, and requiring full protective equipment for everyone on a floor where only one person welds will get the gear ignored across the board.
5. Verify Effectiveness and Improve the Control
Decide how you will know the control worked before you implement it. Personal air monitoring, noise dosimetry, a task observation, or a comparison of near-miss reports across the same period all work, depending on the hazard.
Then go and watch the work. Controls fail in predictable ways: a duct gets disconnected, a guard gets removed to clear a jam and never goes back, a respirator is worn under the beard strap, a checklist gets signed at the start of shift rather than during the task.
Compare the measurement against where you were before, not against a target you invented. If exposure dropped from a level well above the permissible limit to well below it, you have evidence. If your only evidence is that training attendance went up, you have not verified anything.
Feed the result back. Where the control did not perform, revise it or add a layer. Where it did perform, write it into the job safety analysis so the next person inherits a decision with a rationale attached instead of starting from scratch.
Repeated review matters because controls decay. Interlocks get bypassed, ventilation filters load up, and standard operating procedures drift from the actual task. An annual re-check with fresh data catches that earlier than an incident does.
Common Mistakes
Jumping straight to PPE. Issuing respirators or gloves because they are fast and familiar treats the last line of defense as the whole plan. If the only control for an airborne contaminant is a respirator, the respiratory protection program is now the entire engineering program.
Calling training an engineering control. Training is an administrative control. It belongs beneath any physical safeguard, and it should never be described in a report as eliminating exposure. It reduces the chance of exposure only while it is remembered.
Mislabeling substitution as elimination. Removing the hazard means it is gone. Changing the hazard to a milder one is substitution. The distinction matters because substitution can still go wrong and still needs controls beneath it.
Treating a checklist as implementation. A checklist documenting that nothing has changed yet is a record of indecision. Implementation means equipment is installed, procedures are rewritten, and the work has actually been observed in the new arrangement.
Ignoring feasibility. A control that will not be maintained is not effective. If filters cannot be replaced on schedule or the interlock gets bypassed monthly, the real control is a different one, and your record should say so.
Failing to verify. Installing a guard and assuming the hazard is controlled skips the only step that produces evidence. Verify with data or direct observation, then record the result.
Documenting without workers involved. A hierarchy decision written entirely by management, with no one who performs the task in the room, will miss the workaround that already exists and the reason the previous control was bypassed.
Over-applying controls. Controls should match the exposure that exists. Applying the strictest requirement to everyone on a floor tends to train people that the rules are negotiable, which quietly weakens every other control you have.
Applying the Hierarchy When the Top Levels Are Unavailable
Some hazards have no elimination available. Electrical work is the standard example, because the energy source is the hazard and the work exists to work on it. Ergonomic and psychosocial hazards are similar: you cannot delete a repetitive motion or a workload, only change the design and the conditions around it.
Start at the highest level that can realistically operate. For awkward manual handling, that usually means engineering: a lift-assist table, a height-adjustable bench, a fixture that holds the part where the worker’s hands were. Administrative controls like team lifting and rotation come beneath it, and gloves and back belts sit at the bottom.
For psychosocial hazards, engineering controls get adapted into organizational design: workload caps, staffing ratios, recovery time built into the schedule, and mandatory rest breaks. These reduce the hazard by changing the system, not by instructing people to cope better.
When the hazard involves installed equipment you cannot redesign in the moment, document that constraint explicitly and put the effort into the strongest level still available, plus verification of the gap.
Some sources use six levels rather than five. The ANSI/ASSP Z10-2012 model separates warnings and signage into its own tier, sitting between administrative controls and PPE, and splits the framework into controlling the hazard (elimination, substitution, engineering) versus controlling exposure and behavior (warnings, administrative, PPE). Both describe the same preference: remove or isolate the hazard before managing the behavior around it. If your organization uses the six-level version, keep the ordering consistent across your own records.
How to Document the Decision
A usable record answers four questions for every hazard: what the hazard is, which control you chose, which higher levels you rejected, and why. Everything else is optional.
Write the hazard in one specific sentence, including who is exposed and how. Then list the options you considered at each level and mark each one selected or rejected, with a reason for every rejection. “Substitution: rejected, no water-based product on site that meets the finish spec” is a decision. A blank cell is not.
Name the owner, the install date, and the verification method with a review date. In a job safety analysis, this fits naturally as the control column plus a notes field. In a corrective action record, it becomes the root cause analysis with the control hierarchy applied at the recommendation step.
Keep rejected options in the file rather than deleting them. Six months later, the next person will ask whether a higher level was ever considered, and a visible rejected option with a dated reason answers that question without a meeting.
Tie the record back to exposure data where you have it. A control with a before and after number is far harder to quietly dismantle than one justified only by convention.
Frequently Asked Questions
What is the first step in the hierarchy of controls?
The first step is describing the hazard specifically before any control is chosen. Name the source, how exposure happens, which tasks and which people are involved, and the potential severity. Elimination comes next, but elimination cannot be evaluated against a vague hazard. A precise statement also tells you later whether the control actually addressed what it was supposed to.
Can we use more than one control at the same time?
Yes, and most effective programs layer controls rather than picking one. A common combination for airborne dust is a wet or less hazardous method at the substitution level, local exhaust ventilation at the engineering level, exposure monitoring and training at the administrative level, and a respirator for whatever remains. Record each layer separately so you can tell which one is doing the work.
Is training an engineering control?
No. Training is an administrative control because it depends on a person remembering and applying it every time. Engineering controls isolate people from the hazard through physical design, such as machine guarding or local exhaust ventilation, and work even when the worker is distracted. Training sits beneath physical safeguards, and describing it as a permanent control overstates what it can do.
How do we choose between two feasible controls?
Compare them on effectiveness first, then on feasibility, then on cost. Ask what each one actually reduces, whether it protects people who are not thinking about safety, whether you can maintain and staff it, and what evidence you would use to verify it. Pick the stronger option that will still be in place a year from now, and record why the other one was not selected.
Does the hierarchy of controls apply to ergonomic and psychosocial hazards?
It applies to both, with the levels adapted. Elimination means redesigning the task so the awkward reach or the impossible deadline disappears. Engineering controls become fixtures, lift assists, workload caps, staffing ratios, and recovery time built into the schedule. Administrative controls cover rotation and breaks, and PPE covers supportive equipment, which sits at the bottom as usual.
How should employers document their hierarchy-of-controls decisions?
For each hazard, record the specific hazard statement, every option considered at each level, the option selected, and a dated reason for each rejection. Add the owner, install date, verification method, and review date. Keep rejected options in the file, since an auditor will ask whether a higher level was ever explored. Attach before and after exposure data where you have it.
Start with one hazard. Write it down precisely enough that a colleague could picture the task, run the five levels in order, and record the reason for every option you rejected. That single written record, repeated across your operations, is the whole method.