
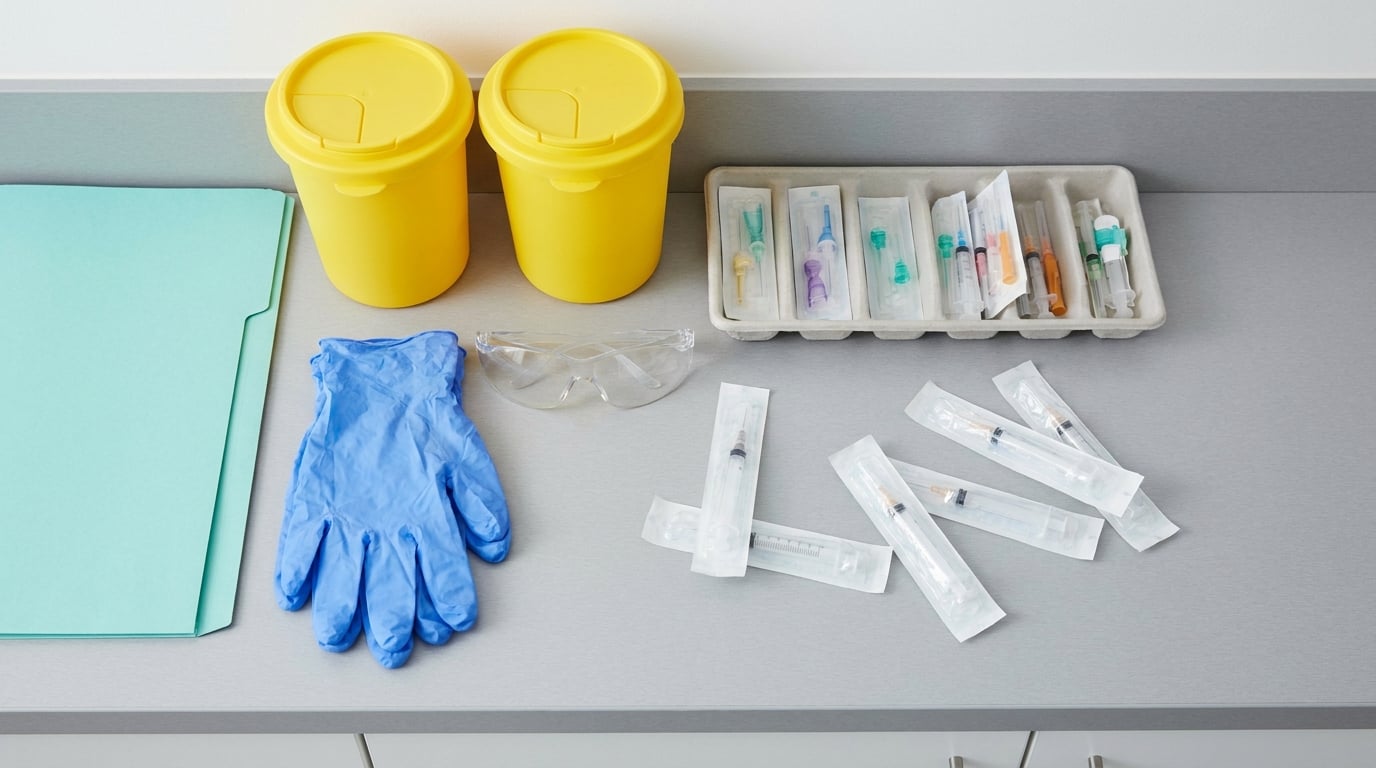
Needlestick injuries are preventable, and the works come down to a hierarchy. Eliminate needle use that has no reason to exist, engineer out the hazard with safety devices and sharps containers that sit within arm’s reach of the task, then use rules, training and PPE as the layers beneath that. How to prevent needle stick injuries at work is a workflow question more than a gear question: a container in the right place at the right time beats anything you hand someone at the door.
This guide is written for US employers, safety leads and workers in healthcare, dental, EMS, veterinary, laboratory, home care and sanitation settings. Most of the work is setup, and a clinic-sized program can be standing in a few weeks if one person owns it. A note on scope: this is procedural workplace safety, not medical advice, and anything about your own exposure belongs with an occupational health clinician.
Aligned with OSHA’s Bloodborne Pathogens Standard (29 CFR 1910.1030) and current CDC guidance as of 2026.
Table of Contents
- What You Need
- Step-by-Step: How to Prevent Needle Stick Injuries at Work
- Step 1: Identify Where Needlestick Injuries Can Happen
- Step 2: Eliminate or Reduce the Hazard
- Step 3: Select and Use Safer Needles and Devices
- Step 4: Establish Safe Sharps Handling Procedures
- Step 5: Place Sharps Containers Where They Are Used
- Step 6: Train Workers and Use Appropriate PPE
- Step 7: Respond to Every Exposure and Review the Program
- Common Mistakes
- Frequently Asked Questions
What You Need
Before you touch workflows, get these eight things in place. A program missing any one of them tends to fail on the same failure mode every time: the sharps pile up on a tray until somebody gets hurt.
- A written exposure control plan that names who owns it, what the rules are, and how it gets reviewed. Employers are required to keep one, review it at least annually, and update it when tasks or devices change.
- Safety-engineered devices for every sharps-handling task your staff actually perform, not just the ones someone remembered to order.
- Puncture-resistant sharps containers within arm’s reach of every point of use, mounted so they stay upright and cannot tip.
- PPE that fits the task: gloves in the correct size, gowns or lab coats, and eye or face protection wherever splashes to the eyes or face are possible.
- Training records and a competency check for each worker, repeated on a schedule and after any change in device or task.
- A post-exposure plan naming the supervisor or clinic to call, the hours it answers, the forms, and which provider does evaluations.
- A reporting path that reaches the plan owner and a written policy that nobody is disciplined for reporting an exposure.
- A sharps injury log capturing the device type and brand, the department and location, and an explanation of how the incident happened, so the data feeds the annual device review.
Work through that list and you will already have closed most of the distance. The steps below turn each item into a habit.
Step-by-Step: How to Prevent Needle Stick Injuries at Work
Step 1: Identify Where Needlestick Injuries Can Happen
Map the work before you buy anything. Walk each task that involves a needle or blade and write down who does it, where, with what device, at what time of day and what surrounds them.
Time of day matters more than people expect. Morning draw rounds, end-of-shift medication passes and code-cart restocking concentrate sharp handling into a few rushed minutes, and rushed minutes are where the injury log fills up. The home health aide working in a kitchen sink and the sanitation worker emptying a clinic’s trash are on the same list even though neither is clinical staff.
You will know the map is good when you could hand it to a new hire and they could point to the two worst spots in the building.
Step 2: Eliminate or Reduce the Hazard
Before adding a control, ask whether the sharp is needed at all. Some steps in a procedure use a needle purely out of habit, and replacing that step removes risk instead of managing it.
Common moves: pre-filled syringes and cartridge systems for injectable medications, needleless transfer and access devices for preparing doses, blunt or blunted cannulae for flushing where the clinical task allows, and single-dose packaging that is opened once instead of re-entered. Where a task can be mechanised, such as a powered aspirator, a specimen processor or an automated labeling line, moving a person out of the needle’s path beats training them to work around it.
Fewer sharps also means less waste, fewer containers to fill and less disposal handling downstream. Elimination is the only tier that never depends on human behaviour.
Step 3: Select and Use Safer Needles and Devices
Safety-engineered devices have a built-in feature that lets you protect the tip with one hand while the needle is still in the patient, the vein or the line. Retractable needles, sliding shields and needles that blunt after one use are the common families, and each is built for a specific task rather than as a universal replacement.
Selection is an ongoing job, not a one-time purchase. The standard requires the employer to document an annual evaluation of commercially available safer devices and to consider frontline feedback, so build that review in: try a device in real conditions, get honest feedback from the people holding it, and keep the one that gets used correctly under pressure.
No device removes the risk on its own. Devices fail when the safety feature is skipped because it slows the room down, so make activation part of the technique and coach it. If a worker says a device is awkward, find out why before you order more of the same.
Step 4: Establish Safe Sharps Handling Procedures
Write the handling rules as positive actions, not prohibitions. “Activate the shield with one hand, then withdraw” beats “do not recap”.
- Activate the safety feature with one hand before the needle leaves the skin, the line or the patient, and keep your other hand clear of the tip at all times.
- Never recap, bend, break, shear, manually remove or otherwise manipulate a used needle with your hands.
- Pass a used device to a neutral zone on the field or a tray rather than hand to hand. Hand-to-hand passing is a routine puncture waiting to happen.
- Never fill a syringe from a vial or a container with a used needle, and never hold an open needle toward yourself or toward another person.
- Dispose at the point of use. The device goes into a sharps container as soon as the task allows, not onto a tray, a counter or a bed.
If a task genuinely has no engineered option, use a mechanical device or a one-handed scoop technique and get the procedure reviewed by your safety lead. Two-handed capping does not belong on that list.
Step 5: Place Sharps Containers Where They Are Used
Container placement decides more injuries than any other single control. If a worker has to cross a room, find a bin, or balance a used device to open a lid, you have built a puncture into the workflow.
- Keep containers within arm’s reach of every point of use, upright, secured, clearly labelled and never overfilled.
- Set a fill trigger before the fill line is reached, commonly around two-thirds to three-quarters full, and swap the container as routine work rather than an emergency.
- Never put anything else in a sharps container: no wrappers, no gloves, no bedding, no food.
- Close and seal a full container, then transport it upright by hand to the disposal point. Do not overfill it to save a trip, and do not leave a filled container loose on a counter or a cart.
- Check container levels on a walkthrough, not a schedule. Busy clinics hit the fill line unpredictably.
Step 6: Train Workers and Use Appropriate PPE
Training covers the standard precautions, the devices in use, and the location of containers and reporting forms, delivered at hire and repeated on a schedule. The part that actually changes outcomes is the competency check: have each worker demonstrate activation and disposal while you watch, and repeat it when the device, the room or the role changes.
On PPE, choose gloves that fit. Gloves that are too big hide a fingertip or roll off during a procedure, and a standard glove is not designed to stop a hollow-bore needle from reaching skin. Change gloves between patients and after any tear or contamination, and add a second pair for the tasks where your own risk assessment calls for it. Eye or face protection belongs on any task where blood or body fluid can reach the face, including irrigation and cleaning up a spill.
Build the reporting habit deliberately. Tell staff plainly that reporting an exposure gets them help fast, and that nobody gets disciplined for it, because fear of paperwork is one of the biggest reasons exposures go unrecorded and prophylaxis starts late.
Step 7: Respond to Every Exposure and Review the Program
Treat every percutaneous or mucous membrane exposure as a real event with a clock running on it. The sequence matters.
- Stop the procedure and deal with the injured person first. Do not squeeze the site aggressively and do not shake the hand.
- Wash the site with soap and running water right away. Flush eyes, mouth or nose with water if a splash occurred.
- Report it to a supervisor and through the workplace reporting system the same shift, including the sharps injury log entry and the OSHA record if the case meets recordability criteria.
- Get medical evaluation as soon as possible, ideally the same day, so a clinician can decide on testing, hepatitis B status and post-exposure prophylaxis. Do not start any medication or treatment on your own.
- Document it, then investigate. Ask what the task was, which device, what the environment looked like, and what would have made the moment safer. Feed that into the exposure control plan and the annual device evaluation.
Every incident is free information about a control that is not working. Programs that treat the report as a learning step get sharper; programs that treat it as a confession get quieter and keep injuring people.
Common Mistakes
These are the failures I would expect to see first in a program that has not been audited. Each one pairs with a correction you can put in place this month.
- Recapping out of habit. Nurses and phlebotomists do it because decades of muscle memory say recapping is careful practice. Fix: remove the two-handed method from the procedure entirely, put containers at the point of use so capping is never needed, and address it directly in competency checks.
- Containers that are too full or too far away. An overfilled container gets bypassed and a used device ends up on a counter or in a regular bag. Fix: set a fill trigger, add container swaps to the daily routine, and verify levels during walkthroughs.
- Passing sharps hand to hand. Fix: neutral zones and trays, and train the handoff with the same seriousness as the disposal step.
- Routine use of standard needles when a safer device exists. Fix: complete and document the annual device evaluation, include frontline staff in the trial, and buy the device that gets used correctly rather than the one on the contract.
- Training as a one-time checkbox. A new hire slide in January does nothing in June. Fix: schedule refreshers, and re-train on every device change and every new hire rotation.
- Treating gloves as the whole defense. Fix: keep gloves, gowns and eye protection in the plan as the last layer, and put the real effort into devices, placement and technique above them.
- Not reporting exposures. Fix: a no-punitive written policy, a one-call reporting route that works after hours, and leadership modelling that treats the first report as a safety win.
- Cleaning up instead of preventing. Fix: after every incident, change the process, not just the person.
A useful quarterly habit is a short walkthrough with one nurse, one tech and one environmental services worker: point at every sharps handling task, then ask where the nearest container is and what they would change. You usually learn something in the first five minutes.
Frequently Asked Questions
What should I do immediately after a needlestick at work?
Stop the procedure and wash the site with soap and running water right away. Flush eyes, mouth or nose with water if a splash occurred. Report it to your supervisor and through your workplace reporting system the same shift, then seek medical evaluation as soon as possible so a clinician can decide on testing and whether post-exposure prophylaxis is indicated. Do not start any treatment on your own.
Do gloves actually prevent needlestick injuries?
Not reliably. Gloves protect the skin from blood and body fluid contact, but a standard glove is not designed to stop a hollow-bore needle from puncturing through it. That is why gloves sit at the bottom of the hierarchy of controls, below elimination, safety-engineered devices, container placement and training. Choose gloves that fit, change them between patients and after any tear, and do not treat them as the plan.
What are safety-engineered needles, and do they eliminate the risk?
They are devices with a built-in feature, such as a retractable needle, a sliding shield or a needle that blunts after one use, that lets you protect the tip with one hand while it is still in the patient or the line. They reduce injuries but do not remove the risk, and they fail when the safety feature is skipped in a hurry. Use the feature every time, and evaluate devices annually with frontline feedback.
How soon should I see a doctor after a needlestick?
As soon as possible, ideally the same day. Post-exposure decisions are time-sensitive, and a clinician may want baseline blood tests, a check of your hepatitis B vaccination status, and a decision about post-exposure prophylaxis. Bring the device or its packaging, a description of the exposure, any information available about the source, and your vaccination history so the evaluation is faster.
Is a needlestick injury reportable to OSHA?
A percutaneous injury from a contaminated or potentially contaminated sharp is treated as a reportable exposure, and it is usually a worker’s compensation claim as well. Federal recordkeeping rules require private-sector employers to log injuries that meet recordability criteria, such as medical treatment beyond first aid or time away from work. Healthcare employers also keep a separate sharps injury log used to drive the annual device review.
If you do one thing this week, walk the building and check where the nearest sharps container sits relative to every task that uses one. Fix the two worst gaps, tell your team what changed and why, and write down what you found. A needlestick prevention program is a system you tune every quarter, not a poster you hang once.