
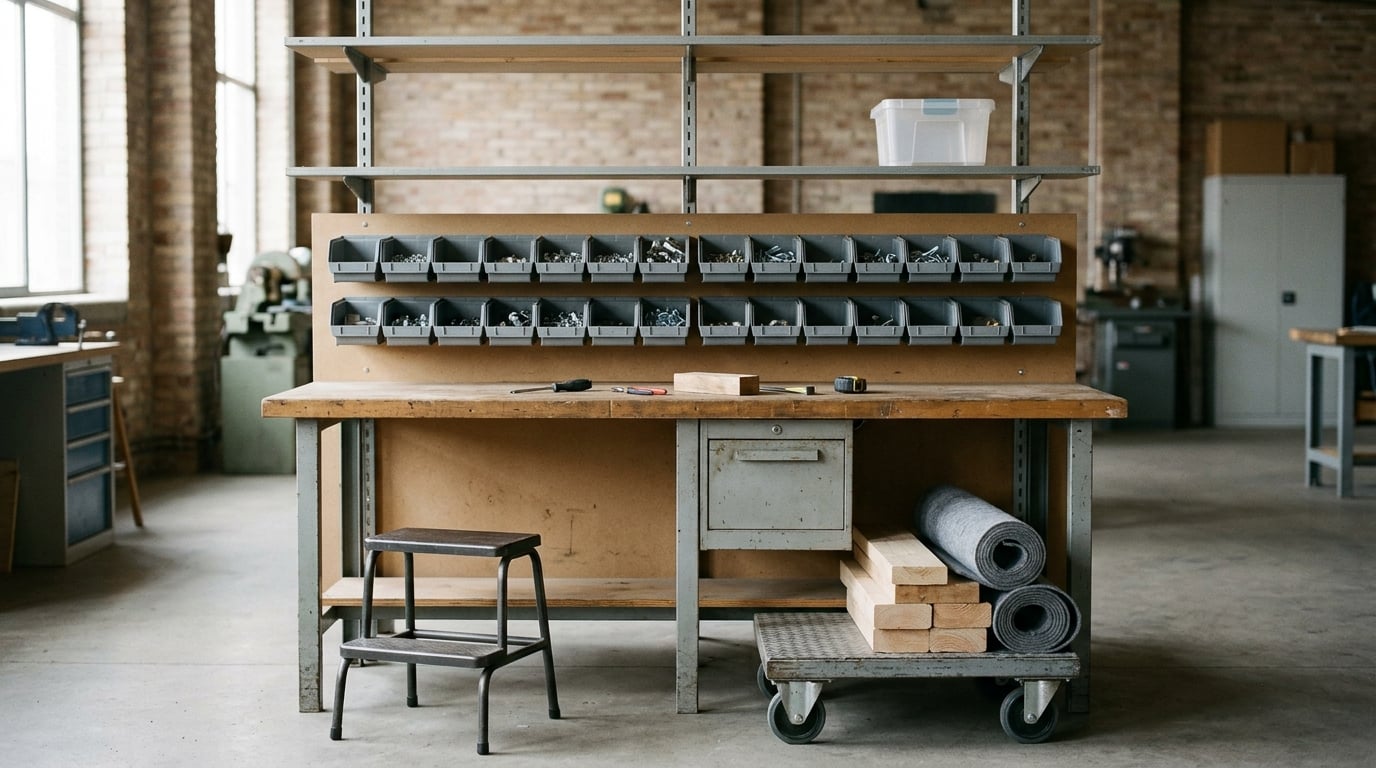
Shoulder pain from overhead work usually starts as a mechanical squeeze. Holding or moving your arms above shoulder height narrows the space under the acromion, the bony shelf over the joint, and presses the rotator cuff tendon and bursa against it. Do that shift after shift and the load eventually outruns what the tissue can take.
The good news is that most of it is preventable, and the changes are mostly practical: lower the height of the task, break up long overhead stretches, build shoulder and upper-back capacity, and report discomfort early instead of working through it. This guide covers what to gather, a six-step process you can start on a real shift, the errors that quietly keep people hurting, and when symptoms need a clinician rather than another ice pack.
It applies to anyone whose hands go above shoulder height for a meaningful part of the day: painters, electricians, HVAC installers, drywall and construction crews, warehouse pickers, mechanics and technicians, window washers, arborists, and nursing or childcare staff. Safety leads and supervisors can use the same steps to build a prevention program, and there is a section near the end on what only an employer can change.
This is general information about preventing shoulder problems, not diagnosis or treatment. Persistent pain, weakness or numbness belongs with a qualified clinician.
Table of Contents
- What You Need
- Step-by-Step: Prevent Shoulder Pain From Overhead Work
- Common Mistakes
- Frequently Asked Questions
- Can overhead work cause shoulder pain?
- What should I do if my shoulder hurts after lifting overhead?
- Are shoulder stretches useful for people who work overhead?
- How often should workers take breaks from repetitive overhead tasks?
- When should shoulder pain from work be assessed by a doctor?
- Can an ergonomic assessment prevent shoulder problems?
- Conclusion: Start With the Workload
What You Need
Before changing an overhead task, you need four things: an accurate record of the exposure, a way to measure improvement, the right equipment, and a route for reporting pain that leads somewhere. Skipping any one of them tends to produce a fix that feels good for a week and then quietly fails.
A record of the actual workload. Note how often arms go above shoulder height, how long they stay there, what the task weighs or how much force it takes, how much of the shift it occupies, and how much recovery time follows. Worker-reported discomfort belongs in the same record, because a task that measures mild can still be the task someone dreads.
A way to judge the change. A baseline comes first: discomfort scores at the start and end of a shift, frequency of high reaching, and how long someone can keep working before the shoulder complains. Without a before number you cannot tell whether the new platform helped or the good week was luck.
Equipment that matches the task. Step stools and rolling platforms, height-adjustable benches, lift-assist or overhead support tools, a second tool for the job that makes you reach, and somewhere to put heavy material that is not your shoulder. The International Ergonomics Association groups the working conditions behind shoulder problems as repetitive and forceful exertions, frequent heavy or overhead lifts, awkward postures, and vibrating equipment, so equipment is only one part of the picture.
Input from the people doing the work, and a referral route. Shoulder problems are among the most common work-related musculoskeletal disorders, a category usually shortened to WMSD. A 2015 analysis put the affected US workforce at roughly 1.8 million people a year, with about 600,000 losing work time. Before anything changes, agree who a worker tells, how quickly they get an answer, and where a persistent symptom gets assessed.
Step-by-Step: Prevent Shoulder Pain From Overhead Work
Six actions do most of the work here, in this order. Each one has a success measure so you know whether it made a difference rather than whether it felt different.
- Measure the overhead exposure before you change anything
- Lower the required arm elevation wherever you can
- Set the work surface and tools to a neutral position
- Lift and reach close, two-handed, without twisting
- Break sustained overhead work with short task changes
- Build shoulder capacity and report pain early
Step 1: Identify the Overhead Workload
Start with an honest exposure baseline, because the fix depends entirely on where the demand actually is. Watch the task rather than asking about it, since people describe the job they remember, not the job they do. Count the reaches above shoulder height, the holds, the weight or force involved, and the minutes of recovery between them.
Three things make a task worse and none of them is arm height alone. Holding the arm up without moving it loads differently than repeating the movement. Force does it too, whether that is a torque wrench, a bucket of plaster, a paint roller extended on a pole, or holding a part while both hands are busy. And a task with no recovery built into it does not recover.
Capture the shoulder complaints at the same time: where the discomfort shows up, when it arrives during the shift, and what it looks like at the end of the day. Record the workers who report stiffness that settles overnight and the ones whose sleep is disturbed, because those two patterns point in different directions.
Success measure: you can name the top three tasks by combined reach, hold time, and force, and you have a start-of-shift and end-of-shift discomfort baseline to compare against later.
Step 2: Reduce or Redesign the Task
Lowering the demand beats managing it, and it is the single biggest lever available. The goal is to cut the angle the arm has to travel, shorten the time it spends there, and remove the force from the position.
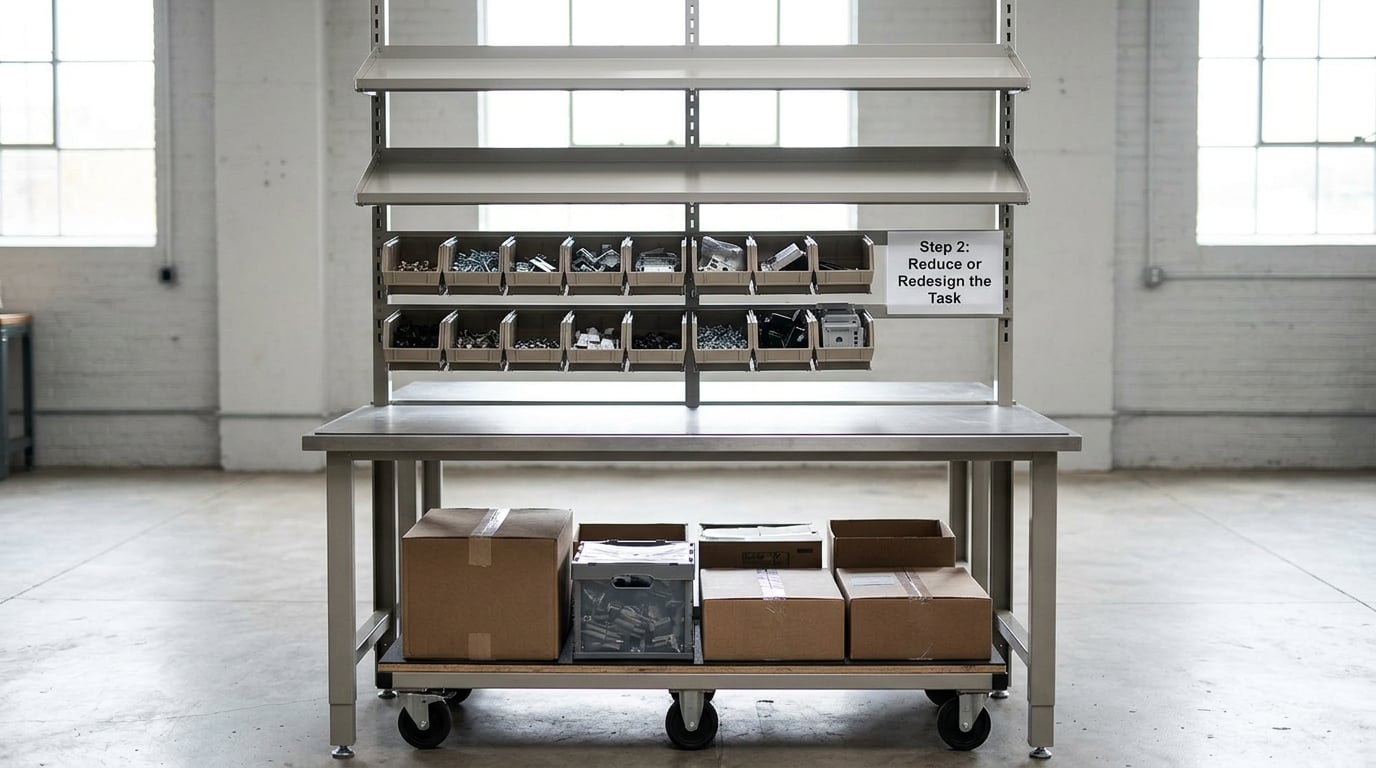
Every high-frequency item you can move down between waist and shoulder height is one fewer reach per cycle. Heavy material that lives on a rolling platform can come to you rather than being lifted to you. What stays overhead should be light, rarely used, and easy to reach without a full stretch. Shorter blocks of overhead work with a different task in between beat one long block at the end of the shift.
What follows is the change that tends to pay off most, job by job. The point is not that a painter and a nurse need different shoulders, it is that the expensive part of their tasks is a different movement.
| Job | The change that reduces shoulder load |
|---|---|
| Painter and decorator | Cut in from a platform instead of a ladder, and use a roller extension so the arm does not stay at full elevation for the whole coat |
| Electrician | Bring the panel or fitting to waist height on a stand before working, and keep one hand free rather than supporting the weight with the shoulder |
| HVAC and duct installer | Support the duct or the ladder jack yourself; lift into position with a second worker or a hoist instead of holding the load overhead |
| Drywall and construction | Use a drywall lift or panel hoist, stage sheets at hip height, and split long overhead sessions into shorter sets |
| Warehouse picker | Match the pick location to a reachable height, use the order sequence to avoid repeated same-direction reaches, and slide heavy totes onto a lower tier |
| Mechanic and technician | Get the vehicle or part to a working height with a lift or a creeper position, and swap hand tools so one arm is not working overhead while the other waits |
| Nurse and childcare staff | Keep supplies between waist and shoulder, use a second person for lifting children, and vary high-reach tasks across the shift instead of clustering them |
Success measure: the top overhead tasks need less arm elevation, and end-of-shift discomfort scores fall within a few weeks of the change.
Step 3: Set Up a Neutral Working Position
Neutral does not mean a single perfect posture, it means the task sits close to your body in a position you can hold and change. A neutral range differs by person and by task, so set the station to the person doing the work rather than to a diagram.
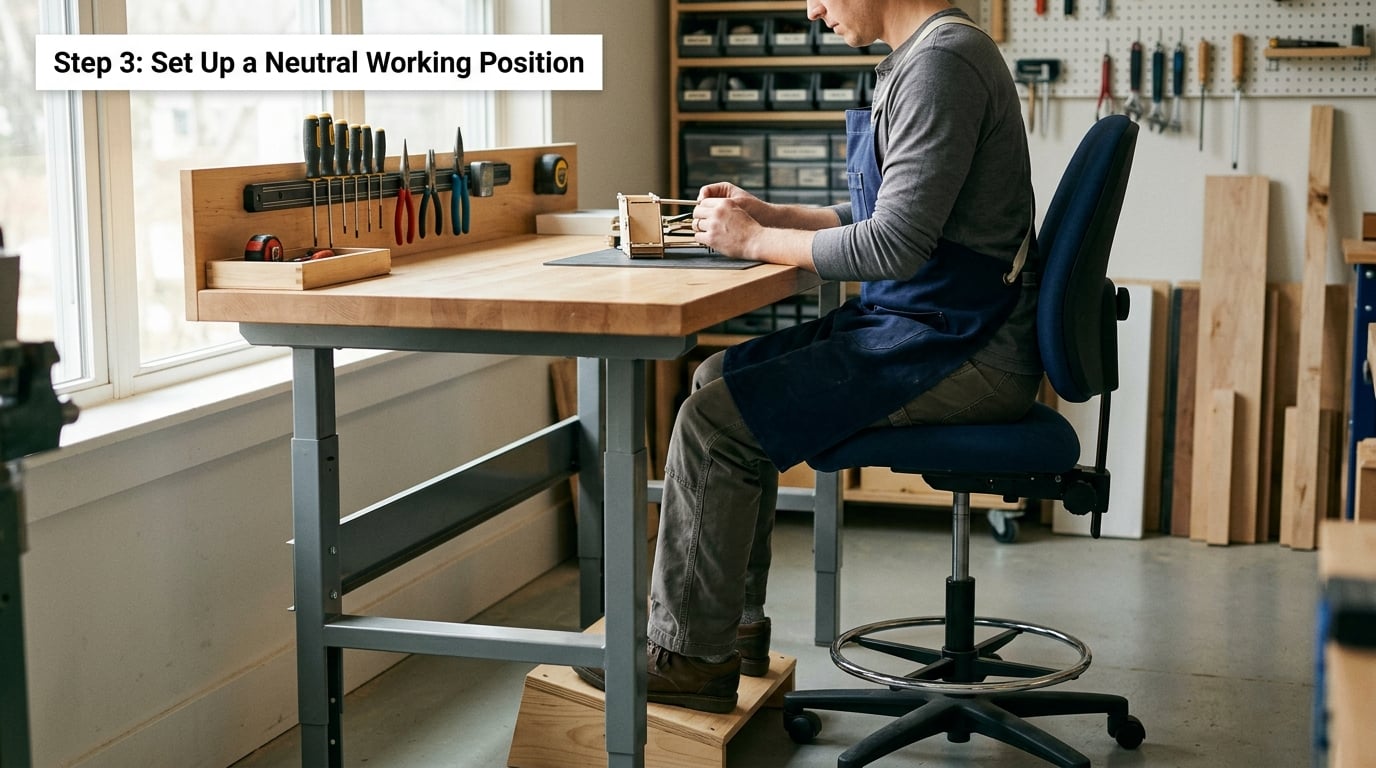
Height-adjustable surfaces are the workhorse here. Set the work so the hands can do most of the task between waist and shoulder height, and set it again for each person who uses it. If the only available surface is fixed, that changes what the job can be: more rests, shorter holds, or an aid.
Put the tools and parts you use most within forearm reach, and anything you use rarely away from that zone. A rotating tool caddy, a wall rail, or a parts trolley between waist and shoulder height removes a surprising number of reaches from a shift. Where the task allows, move into the work instead of reaching to it.
Support the lower body too. A worker standing for hours on a hard floor at an awkward height will compensate with the shoulder whether or not the shoulder is the problem. Seating that adjusts, a stable footrest, and a mat change how long someone can hold a position without trading one joint for another.
Success measure: the most-used tools sit within easy reach of the working position, and the person can keep the task at or below shoulder height for most of its duration.
Step 4: Use Safer Lifting and Reaching Habits
Some overhead work cannot be removed, so the movement itself carries more of the load. A few habits change the demand on the tendon without asking for a new workstation.
Keep the load close. An object held at arm’s length multiplies the effort on the shoulder several times over, so step in under it or get a hand nearer to it before you lift. Use both hands when the task allows; one-arm overhead lifting asks the cuff to do work that two arms share.
Turn your feet instead of twisting your spine. Reaching up and twisting at the same time is a much bigger ask on the shoulder than either movement alone, so move the base, position the vehicle, or stage the material differently before you start.
Change position rather than holding one. Holding the arm up motionless for a fixed stretch is its own demand, so lower it when the task allows and come back to it. Avoid the repeated small adjustments overhead, the reaching to check something you already checked, and the one-handed carry that includes twenty seconds of holding.
Know the line where a task stops being yours. If the reach, the height, or the force exceeds what you can manage, ask for a hand, a different sequence, or the right equipment. That request is a task-design conversation, not an admission.
Success measure: fewer one-handed overhead lifts and twists, and tasks handed off or requested before the shoulder starts to complain.
Step 5: Build Recovery Into the Work
Tissue tolerates work in doses, and the dose is where the recovery sits. A shift of unbroken overhead work has none, which is why the last hour of a repetitive overhead task hurts more than the first.
Short task changes every 30 to 60 minutes do more than long scheduled breaks. Arming down, walking to another part of the job, or shifting to a seated task for a few minutes gives the cuff a break while the shift continues. Formal breaks are good, but they tend to arrive after the fatigue has already set in.
Alternating high and low intensity duties helps in a way that a single mid-shift break cannot. Where scheduling allows, spread the heavy overhead tasks across the day and across the crew rather than front-loading them into one block. Movement variety through the shift, which occupational health frameworks treat as a core ergonomic control, is worth more than a stretching routine bolted onto the end of it.
Protect the hours off the clock too. Sleep is when tissue does most of its repair, and a night spent with the arm overhead keeps an already-irritated tendon irritated for hours. Staying on one side, supporting the arm with a pillow, and not drifting into the overhead position is a small change that costs nothing. Fatigue undermines technique as well: a tired worker reaches higher, twists more, and takes longer breaks, so a ten-hour shift and a six-hour shift are not the same task repeated.
Success measure: no more than 60 minutes of continuous overhead work before a task change, and disturbed sleep drops as the week goes on.
Step 6: Strengthen, Monitor, and Act Early
Reducing demand protects a shoulder. Building capacity is what lets someone get back to the work without the symptoms creeping back every time they return.
General shoulder conditioning for this kind of job centres on the rotator cuff, the four muscles known as SITS (supraspinatus, infraspinatus, teres minor, subscapularis), and the scapular stabilisers including serratus anterior and the lower trapezius. What these muscles share is a demand for strength endurance, the ability to keep producing force for a long time, rather than peak strength in a single effort. Endurance is the quality the job actually spends.
Tendon tissue responds to slow, loaded, progressively increased work. Heavy slow resistance and isometric holds, at a load you can control and hold without compensating, suit that goal better than a programme of light bands with high repetitions. Build gradually and start well below the load that hurts; adding work in sudden spikes from overtime, a new role, or a rush job is how an average week turns into a problem month.
Track symptoms rather than memory. A simple weekly note of end-of-shift discomfort, the tasks that now bother you, and disturbed nights gives you and your clinician something concrete. And ask about accommodations early: a modified sequence, a different station, a rotation that puts the overhead block earlier rather than later, or a temporary change in duties usually helps more than treating around an unchanging task.
Some symptoms should not wait. Get assessed promptly if you cannot lift the arm at all, if weakness is progressing, if the shoulder looks deformed, if there was significant trauma, or if you have fever, redness, or marked swelling alongside the pain. Night pain that disturbs sleep and weakness that keeps getting worse are two classic rotator cuff warning signs worth naming to a clinician. Pain that persists beyond two to three weeks despite changed tasks, or that is limiting what you can do at work, deserves an assessment too.
Success measure: weekly discomfort scores trending down, the tasks you avoid shrinking, and any worsening symptom raised within days rather than weeks.
Common Mistakes
Most shoulder trouble at work continues for one of six reasons, and each has a fix you can apply this week.
Treating pain with extended rest
The instinct after a bad week is to stop reaching. That reduces symptoms briefly and lowers your capacity, so the same task hurts again at the same level when you return, sometimes worse. Fix: keep moving within a comfortable range, reduce the dose rather than removing the activity, and raise it gradually as tolerance returns.
Waiting until pain appears before doing anything
Prevention that starts at the first twinge is really treatment. By the time overhead work hurts at rest, the tendon has been irritated for weeks. Fix: use the baseline from Step 1 to set the load before symptoms appear, and treat a rising discomfort score as a workload signal, not a personal failing.
Choosing the intervention that matches the label
Shoulder pain from work gets called impingement, rotator cuff tear, or a frozen shoulder, often from a scan that did not explain the symptoms. Imaging findings of this kind are common in people with no pain at all, and the subacromial impingement label in particular is used far more often than the evidence supports. Fix: a 2019 Cochrane review found subacromial decompression did not perform better than placebo surgery, and a 2019 BMJ guideline did not support decompression for non-traumatic shoulder pain beyond three months, so a physical assessment tells you more than the scan. Work on load and capacity rather than on clearing an image.
Leaving the task untouched and treating around it
Twenty minutes of hands-on treatment for a task that demands eight hours of overhead reach treats the consequence and leaves the cause. Fix: change the task first, then support recovery. If the task cannot change, say so plainly and record it, because an unchanged hazard is an employer problem, not a worker one.
Building everyone to one standard
The same ladder or the same reach range does not suit a 5’2″ worker and a 6’2″ one, and a fixed assumption is how good intentions produce a second injury. Fix: set stations to the person using them and check them again when the person, the task, or the product changes.
Hiding symptoms to keep the job
Trade cultures reward pace, and workers routinely say nothing until they cannot do the task. That is also how a manageable problem becomes a long absence. Fix: report discomfort early and in task terms. Naming the specific reach, hold, or shift that caused it is far harder to dismiss than naming a pain, and it hands the supervisor something they can act on.
Six habits carry most of the benefit: lower the work to where the arms already are, break long overhead stretches with task changes, keep heavy material on a platform instead of your shoulder, build cuff and upper-back endurance in slow loaded work, ramp new duties gradually, and say something the first week it hurts instead of the sixth.
Frequently Asked Questions
Can overhead work cause shoulder pain?
Yes. Repeatedly holding or moving the arm above shoulder height narrows the space under the acromion, where the rotator cuff tendon and bursa pass, and compresses them. The space narrows as the arm rises, so overhead positions are where the tissue is most squeezed. Add repetition, sustained holds, force, and poor recovery, and the load exceeds what the tendon and cuff can manage. That is why shoulder pain is one of the most common work-related musculoskeletal problems in trades, warehousing, and healthcare.
What should I do if my shoulder hurts after lifting overhead?
Change the dose, not just the day. Avoid the specific reach or load that triggered it, and do something within a comfortable range rather than stopping all shoulder movement. Build recovery into the next shift with task changes every 30 to 60 minutes, and check whether the task, the height, or the force is the part that needs redesigning. If the pain is not settling within two to three weeks, is waking you at night, or is getting weaker, have it assessed by a qualified clinician.
Are shoulder stretches useful for people who work overhead?
They help at the margin, not as the main strategy. Gentle movement through a comfortable range supports recovery, and thoracic spine extension mobility matters because a stiff upper back forces the shoulder to work higher. But stretching cannot offset eight hours of accumulated load, and a hard stretch into an irritated shoulder can make it worse overnight. Put more effort into task design, dosing, and building cuff and scapular endurance, and treat stretching as the smaller part.
How often should workers take breaks from repetitive overhead tasks?
Shorten the first gap rather than waiting for a scheduled break. Changing task every 30 to 60 minutes is generally more useful than one long break, because it interrupts fatigue before fatigue sets in. Microbreaks count even without leaving the workstation: arm down, walk to another part of the job, or switch to a seated task for a few minutes. Where scheduling allows, alternate high-intensity and lower-intensity duties across the shift instead of clustering the overhead work into one block.
When should shoulder pain from work be assessed by a doctor?
See someone promptly if you cannot lift the arm at all, if weakness is progressing, if the joint looks deformed, or if you have fever, redness, or marked swelling with the pain. Night pain that disturbs sleep and increasing weakness are two classic rotator cuff warning signs. Also seek assessment for pain that persists beyond two to three weeks despite changed tasks, or that is limiting what you can do at work. An occupational-health clinician can assess both the shoulder and the task, which treatment alone does not.
Can an ergonomic assessment prevent shoulder problems?
It can reduce the demand, which is the part that matters most. An assessment usually involves watching the task, rating its load, and recommending changes to reach, height, force, and recovery. Common tools include the Rapid Entire Body Assessment (REBA), the Rapid Upper Limb Assessment (RULA), and the Ovako Working Analysis System (OWAS). A worker can reasonably ask for a task review when discomfort keeps returning, and the request is strongest when it names the specific task, reach, and shift pattern involved.
Conclusion: Start With the Workload
If you do one thing from this guide, measure the overhead exposure before the pain arrives and cut the demand in the worst three tasks. Shoulders that hurt during overhead work are usually carrying more, for longer, and with less recovery than they can adapt to, so changing the position and the dose does more than any stretching routine or single session of hands-on care.
Then keep three habits running: break sustained overhead work with a task change every 30 to 60 minutes, build rotator cuff and upper-back endurance gradually with slow loaded work, and report discomfort in the first week rather than the sixth. The pattern is the same almost everywhere it shows up: an ache that arrives gradually, a threshold that keeps dropping, and very little guidance about what to change on the actual job.
For supervisors and safety leads, the useful part is the part you control: task sequence, station height, equipment, and recovery time. A prevention program built around the task gets further than one built around a poster, and if an unchanged hazard is what remains, record that clearly. When symptoms persist beyond two to three weeks, disturb sleep, or keep getting weaker, get a qualified clinician involved, because a shoulder that needs assessing is not a problem anyone can solve by working through it.